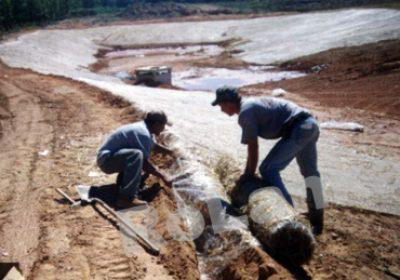
Erosion is a natural process, but when left unchecked, it can lead to significant environmental damage, particularly in sensitive areas like streambanks and wetlands. One effective solution for controlling erosion is the use of temporary erosion control mats. These mats provide immediate protection against soil loss while allowing for the establishment of vegetation.
In this guide, we’ll walk you through the steps for selecting and installing temporary erosion control mats such as BioD-Straw and JuteMat.
Step 1: Assess the Site
Before installation, it’s crucial to assess the area where you plan to install the erosion control mats. Identify the specific erosion risks, soil types, and any environmental considerations, such as proximity to water bodies or sensitive habitats.
Step 2: Select the Right Erosion Control Mat
Choosing the right temporary erosion control mat is key to effective erosion management. BioD-Straw and JuteMat are popular options that offer unique benefits. BioD-Straw mats are composed of straw fibers, providing excellent moisture retention and promoting seed germination.
Step 3: Prepare the Site
Once you’ve selected your mats, prepare the installation site by clearing any debris, rocks, or vegetation that may obstruct the mats.
If you’re working on a slope, you may want to install a series of check dams or silt fences to slow down water flow before placing the mats. These measures can enhance the effectiveness of your professional grade erosion control blankets.
Step 4: Lay the Mats
Carefully unroll the mats and lay them over the prepared area. Ensure that they cover the entire surface needing protection, with a slight overlap at the edges (typically 4-6 inches) to minimize gaps where soil could wash away.
Step 5: Secure the Mats
To prevent the mats from moving or blowing away, secure them properly. Use biodegradable pine wedges or oak stakes to anchor the mats into the ground. For slopes, place the stakes along the edges and in the middle of the mats for added stability. Ensure that the stakes penetrate deeply enough to hold the mats in place but do not damage the underlying soil structure.
Step 6: Monitor and Maintain
After installation, regularly monitor the site to ensure the mats remain intact and effective. If you notice any areas where the mats have shifted or degraded, take prompt action to repair or replace them. It’s also helpful to add mulch or seed to enhance vegetation growth and increase soil stability, particularly in commercial soil erosion control products.

Check out the complete installation guide by RoLanka International Inc. here.
For high-quality erosion control solutions and more information on their extensive range of erosion control products, including bulk coir erosion control products and streambank restoration materials, visit RoLanka International Inc. Call them now.
